Low-Code Checkout Button
Embed a low-code RM checkout button (<rm-pay-button>) into any web page or e-commerce site with minimal coding effort.
When to Use
▾
Use this approach when:
- You want to add RM checkout to a static or low-code site
- Avoiding a full plugin installation
- Quick proof-of-concept integration
How to Use
▾
Setup & Configuration
▾
-
Go to RM Merchant Portal, and login with your merchant account.
-
Go to Developer > Applications > Choose Your Application > Low Code Checkout
-
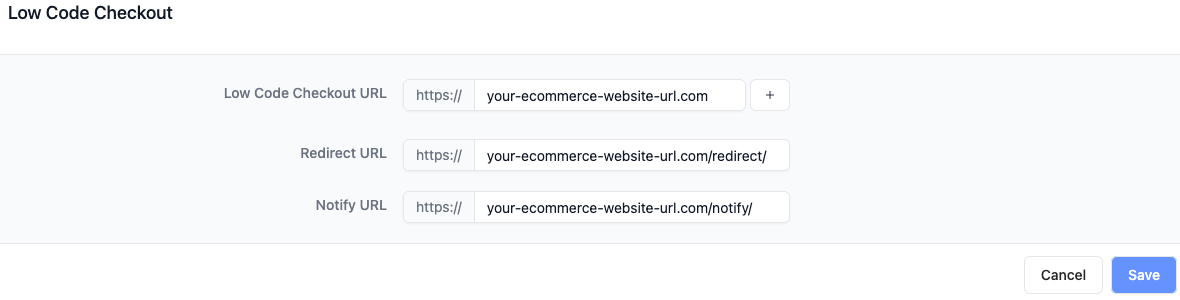
Low Code Checkout Host
To enhance the security of your e-commerce website, it is essential to allow us to identify requests originating from your site rather than from others. This will enable us to provide improved security measures during the order process.
For instance, if your website URL is https://somedomain.com/webpage/order, you should configure it so that only somedomain.com is authorized to proceed with the checkout payment.
- Redirect URL
The URL to redirect when the payment for the order is completed by the user (either successful or failed) and example of redirect url parameters so you can handle page rendering accordingly with status, id and reason.
- Notify URL ( Optional )
Client can also specify the URL to which users should be redirected after completing their payment for the order, regardless of whether the transaction was successful or failed. Additionally, refer to the example of redirect URL parameters to ensure you can manage page rendering based on the status, ID, and reason provided.
Example of notify url parameters
Checkout Button
▾
- Add the stylsheet and script tag to your head
1<head>2 <!--- ... -->3 <link rel="stylesheet" href="https://rm-component.oss-ap-southeast-3.aliyuncs.com/checkout-button/index.css"/>4 <script type="module" src="https://rm-component.oss-ap-southeast-3.aliyuncs.com/checkout-button/index.js"></script>5</head>
Alternatively, if you are developing for sandbox environment, please amend the link to below
1<head>2 <!--- ... -->3 <link rel="stylesheet" href="https://rm-component-sandbox.oss-ap-southeast-3.aliyuncs.com/checkout-button/index.css"/>4 <script type="module" src="https://rm-component-sandbox.oss-ap-southeast-3.aliyuncs.com/checkout-button/index.js"></script>5</head>
- Add the button with the checkout details to the body
1<body>2 <!--- ... -->3 <rm-pay-button4 clientId="1698131134927762904"5 orderId="1234567890"6 storeId="10946114768247530"7 customerId="123123123"8 currency="MYR"9 amount="1390"10 title="Product X"11 detail="Detail of the order"12 >13 Checkout14 </rm-pay-button>15</body>
Button Parameters
▾
Client ID of your application
Example: 1698131134927762904
Order ID, unique for each order
Example: 1234567890
Store ID for the order
Example: 10946114768247530
Currency
Example: "MYR"
Amount in cents
Example: 1390 => RM13.90
Order title
Example: "Product X"
Order detail
Example: "Detail of the order"
Order additional data
Example: Any data relevant to the order
Customer ID, required for tokenization
Example: 1234567890
Customer name
Example: "John"
Customer email
Example: "[email protected]"
Styling Paramters
▾
Button variant types
Custom class for custom styling
Example (Variants)
▾
| Variant | Button |
|---|---|
| default | |
| destructive | |
| outline | |
| secondary | |
| ghost | |
| link |